
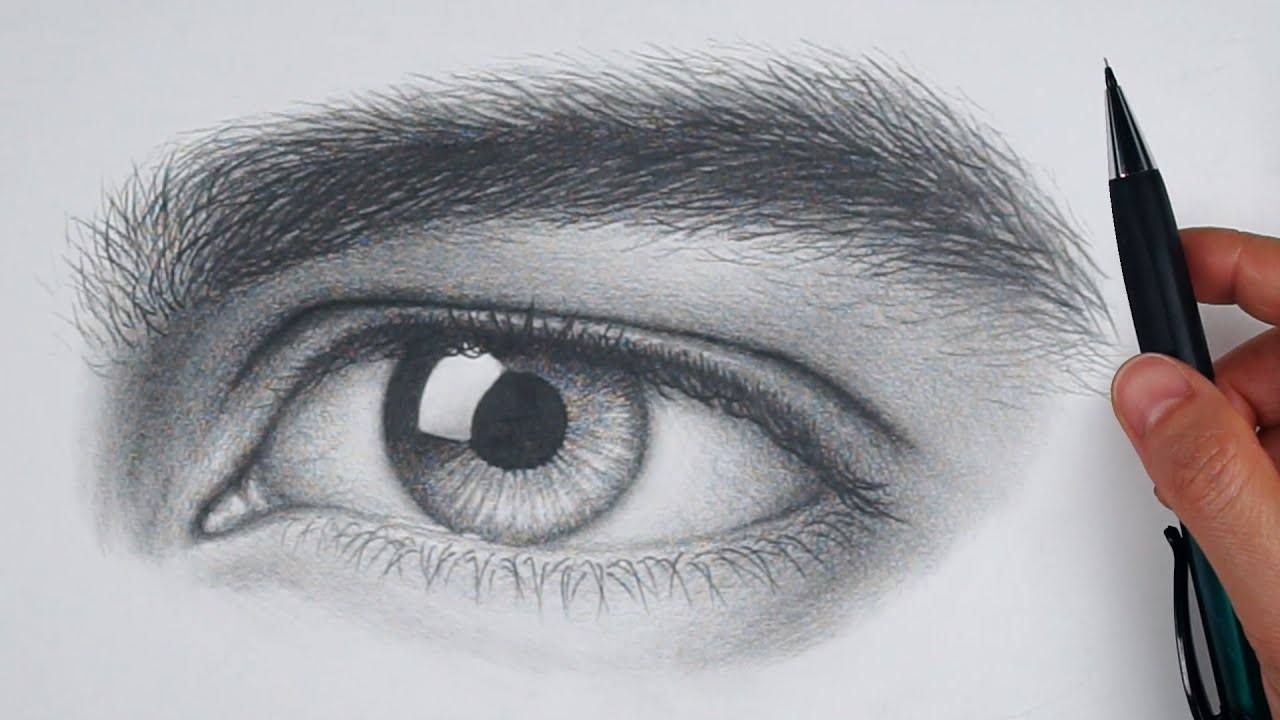

How to draw an Eye?
Sketching realistic eyes, according to what we've heard from numerous artists, is the most difficult aspect of drawing face features. We're not claiming that adopting these seven suggestions would instantly improve your abilities. Drawing eyes, like anything else, requires time, practise, and a lot of patience. This article can help you get started and understand how to properly grab eyeballs by providing the fundamentals. Here's how to get started, starting with rule #1 : sketch what you see!
1. Draw what you see!
Remember the golden rule before we get into the nitty gritty of creating realistic eyes: Draw what you see! We generally imagine a football with a wide circle in the centre when we think of eye form. At the same time, we know that if we drew these simple forms without any detail, they wouldn't resemble an eye in the least (realistically, anyway). Before you begin, take a close-up photo of your own eye and analyse it well. Take note of the pupil and iris positioning, the shape of the eyelashes, the iris pattern, and shadowing.
2. The basic outline
Begin by sketching the contour of the eye. It doesn't have to be very detailed, but it should be accurate. You'll also want good light lines so the drawing doesn't end up with a rigid outline. Remember the spacing guideline while creating the outline: one eye length between the two eyes and five eye lengths across the face. It will be easier to arrange and size items if you keep this in mind.
Important! Asymmetry exists in the eye. Look at your reference photo attentively since the top and bottom lash lines will be different.
When positioning the iris, keep in mind that the upper eyelid will partially obscure it. To put it another way, the entire iris should not be visible through the white of the eye. The iris should sit on or just below the lower eyelid in the lowest third.
3. Filling in the pupil
The pupil will be a black part of the eye, but we recommend not pushing too hard with your pencil because it will be tough to erase if necessary. Fill it in with layers instead. Fill in the area lightly, then go over it with a blending stick and continue until satisfied.
4. Shading the iris
We'll begin by softly darkening the iris. At this time, we won't be using our pencils directly on the iris. Grab a spare piece of paper and scribble on it to get as much graphite down as possible. Pick up some of the graphite with your blending stick and shade the iris with the blending stick. This results in extremely light shading, which is exactly what we desire.
5. Adding detail
Use a mechanical pencil to draw the lines in the iris. This method is ideal for achieving small-scale detail. They should be drawn in a hasty and haphazard manner. Make sure the pupil and iris lines are separated by a few millimetres. You should also draw in the highlights at this stage. It's critical to preserve those highlight regions graphite-free throughout the next procedures.
Filling up the area surrounding the pupil is the next stage. Blend over this region until the pupil's black graphite merges in with the outside ring. Begin dragging your blending stick outward from the centre of the pupil, merging those small lines for a smooth finish.
Form a pointed tip with your kneaded eraser and remove certain portions of the iris for highlights. Don't go too far with this! If you make a mistake, you can easily conceal the additional highlights with your blending stick. When using a kneaded eraser to create highlights, make sure to use various regions of the eraser after picking up graphite, otherwise you'll have trouble extracting additional graphite.
To soften the appearance, outline the iris and the outer ring of the pupil, then mix the outlines. Return to the highlights you produced previously and darken the area surrounding them to make them stand out even more.
Continue adding highlights and mixing until you achieve the desired effect.
6. Shading the whites
You should begin darkening the whites of the eyes with very light shading. We'll use the same technique we used to darken the iris using the blending stick before.
Shade the fold beneath the brow and above the eyelash as well.
Draw blood veins flowing from the corners of the eyes using a strong pencil. Small nuances like these help to make your eye appear more natural. Apply a blending stick to the white of the eye.
7. The eyelashes
It's critical to consider the angle of the top eyelashes while drawing them in. The outer lashes, in particular, will not be exactly straight. Examine the lashes in a photo of your own eye. Make a drawing of them as you perceive them. Because they overlap other sections, sketch them last. The reflection on the eyelashes in the iris highlight is a minor detail to remember.
Lower lashes should be lighter in colour, and remember to check your reference photo for location and form!
Drawing realistic eyes requires a lot of attention to detail, but don't let that deter you. Always remember to take things slowly and sketch what you observe. Practicing frequently is the most effective approach to develop! We recommend bringing a sketchbook with you at all times. Any moment you have, even if it's only 5 minutes, you should be drawing away on any area where you believe you can improve. If you don't get it right the first time, please don't give up! It isn't intended to be easy, but with practise, you will improve. Continue to sketch!
#eyes
#howtodrawaneye
#draw
Sharing = earning
1,000,000 views = € 1,000
100,000 views = € 100
10,000 views = € 10
1,000 views = € 1
500 views = € 0.50
250 views = € 0.25
100 views = € 0.10
50 views = € 0.05
25 views = € 0.025
10 views = € 0.01
And much more
- Comments (1)
- Recommended
- Milestones

Christiaanskunst
3 years ago
Here are your recommended items...
Here are your milestones...

