
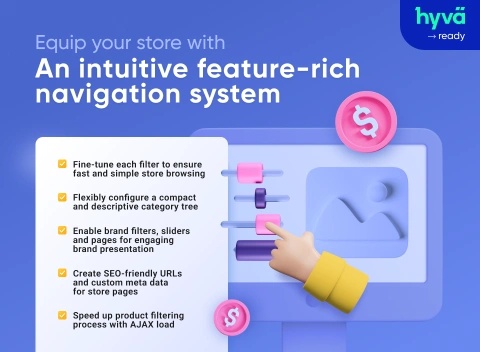

How to Magento 2 Add Sort by Option: A Complete Guide
Magento 2 is a powerful e-commerce platform that offers a wide range of features out of the box. One of the essential functionalities for any online store is the ability to sort products in various ways to enhance the shopping experience. While Magento 2 provides default sorting options like position, product name, and price, you might want to add custom sorting options to meet your business needs. In this article, we’ll guide you through the process of adding a custom magento 2 add sort by option.
This guide will walk you through the steps to add a Magento 2 add Sort by Option. Whether you're looking to sort products by popularity, ratings, or a custom attribute, this guide covers it all.
Before diving into the customization, it’s important to understand how sorting works in Magento 2. The "Sort By" options are typically available on category and search result pages. These options allow customers to sort products by different attributes, improving navigation and product discovery.
By default, Magento 2 includes sorting options like:
Position: The default sorting based on the product’s position in the category.
Product Name: Alphabetical sorting of products.
Price: Sorting products based on their price (low to high or high to low).
WhyMagento 2 add Sort by Option?
The "Sort By" functionality is crucial for improving the usability of your online store. By adding custom sorting options, you can:
Enhance User Experience: Allow customers to sort products in a way that suits their preferences, making it easier for them to find what they're looking for.
Increase Sales: By sorting products based on factors like popularity or ratings, you can highlight best-selling or highly-rated items, encouraging more purchases.
Tailor Your Store: Customize the sorting options to align with your business goals and the unique needs of your target audience.
Step 1: Create a Custom Attribute (If Necessary)
Before you can add a new sorting option, you may need to create a custom attribute in Magento 2. For example, if you want to sort products by a specific attribute like "Best Sellers" or "New Arrivals," you'll need to create this attribute first.
Navigate to the Admin Panel: Log in to your Magento 2 admin panel.
Go to Stores > Attributes > Product: This will take you to the product attributes section.
Click on "Add New Attribute": This button is located at the top-right corner of the page.
Configure the Attribute:
Attribute Code: Enter a unique code for your attribute (e.g., best_seller).
Default Label: Enter a label that will be displayed on the product page (e.g., "Best Seller").
Catalog Input Type for Store Owner: Choose an input type (e.g., "Dropdown" or "Yes/No").
Set Attribute Properties:
Use in Layered Navigation: Set this to "Filterable (with results)" if you want this attribute to be used in layered navigation.
Use for Sorting in Product Listing: Set this option to "Yes."
Save the Attribute: Once you've configured all the necessary settings, click "Save Attribute."
Assign the Attribute to an Attribute Set: Navigate to Stores > Attributes > Attribute Set, and add the newly created attribute to the desired attribute set.
Step 2: Update the Product Collection
Once your custom attribute is created, the next step is to update the product collection so that Magento 2 recognizes your new sorting option.
Create a Plugin: To add the custom sorting option, you need to create a plugin that modifies the product collection.
Extend the Product Collection: In your custom module, extend the Magento\Catalog\Model\ResourceModel\Product\Collection class to include your new sorting option.
Add the Sorting Option: Use the setOrder method to add your custom sorting logic. For example, if you're sorting by the "Best Seller" attribute, you might use something like this:
Test the Changes: After adding the sorting logic, test the changes on your store's front end to ensure the new sorting option works as expected.
Step 3: Modify the Category Page Layout
To display your new "Sort By" option on the category pages, you need to modify the layout XML files.
Navigate to Your Theme Directory: Go to your theme's directory in app/design/frontend/[Vendor]/[Theme]/Magento_Catalog/layout/.
Open the catalog_category_view.xml File: If this file doesn't exist, create it.
Add the Sorting Option: Insert the following code within the block:
Save the File: After adding the code, save the catalog_category_view.xml file.
Flush the Cache: Navigate to System > Cache Management in the Magento admin panel, and flush the cache to apply the changes.
Step 4: Test and Debug
After implementing the custom "Sort By" option, it's crucial to test it thoroughly to ensure it works as intended.
Check the Frontend: Visit a category page on your Magento 2 store and use the "Sort By" dropdown to test your new sorting option.
Check for Errors: Inspect the browser console and server logs for any errors or warnings. If you encounter any issues, revisit the steps above to ensure everything is correctly implemented.
Test Different Scenarios: Test the sorting option with different categories, products, and customer segments to ensure it behaves consistently across your store.
Conclusion
Adding a custom magento 2 add sort by option is a straightforward process that can significantly enhance your customers' shopping experience. By following the steps outlined in this guide, you can easily create and implement custom sorting options based on any product attribute. This flexibility allows you to tailor your Magento store to better meet your business needs and improve overall usability.
Whether you're looking to highlight bestsellers, newly added products, or other custom attributes, Magento 2 gives you the tools to customize your store's sorting options with ease.
Sharing = earning
1,000,000 views = € 1,000
100,000 views = € 100
10,000 views = € 10
1,000 views = € 1
500 views = € 0.50
250 views = € 0.25
100 views = € 0.10
50 views = € 0.05
25 views = € 0.025
10 views = € 0.01
And much more
- Comments (0)
- Recommended
- Milestones
No comments yet
Here are your recommended items...
Here are your milestones...

