


How to record screen on mac?
Use Screenshot or QuickTime player to record portions or the entire screen. If you haven't updated your operating system in a while or your Mac is an older model, you shouldn't be worried. A screenshot toolbar can be displayed by holding down Shift, Command, and 8. Use the onscreen controls to record your entire screen, a portion of your screen, or to take a screenshot of your screen. The File New Screen Recording option appears after you open the Applications folder in QuickTime Player. If you choose the Screen Recording window, you'll see the onscreen controls described above. Change the recording settings before the recording begins by clicking the arrow next to the Record button.
With the release of Mojave in 2021, Apple introduced built-in screen recorders built into macOS and prohibited the use of third-party screen recording apps. You can take screenshots of whatever is happening on your screen in a quick, easy, and convenient way. You will be able to use this feature with Mac OS Mojave or an upgrade.
Mac screen recording instructions:
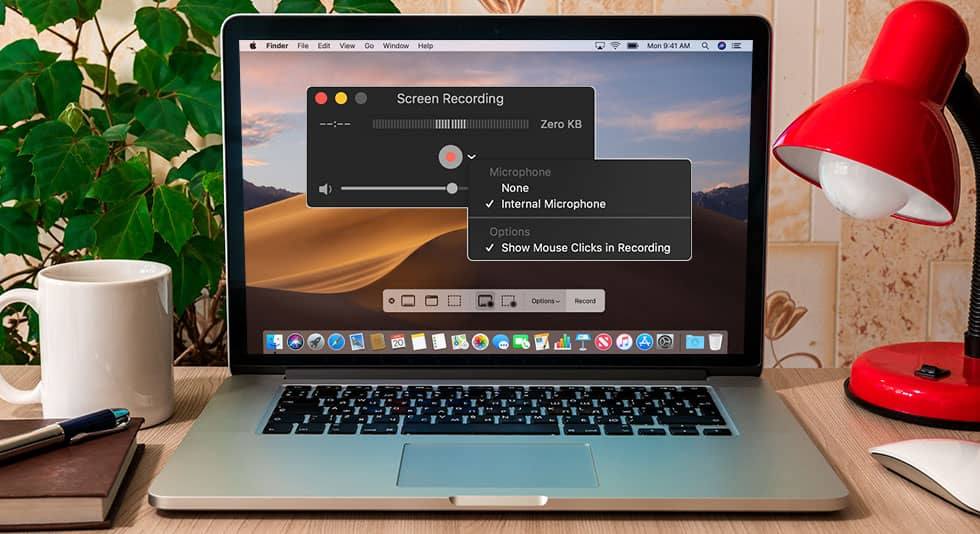
• Recording your voice or other audio will be easier with a microphone.
• You can hear what you have recorded if you adjust the volume.
• In some cases, audio feedback will occur if you don't use a microphone or lower the volume of your headphones.
• Choose the Show Mouse Clicks in Recording option to see a black circle around your pointer when you click.
• You might want to capture a menu you want to view in a restaurant or a part of a website you want to share with someone.
• As well as recording the Mac screen, you can also create a video.
• The same goes for a video. The two tasks are fairly straightforward, so let's take a look at how they work.
• Clicking and dragging your mouse cursor can be used to record the entire screen or a specific part of the screen. Screenshots and screen recordings are now easily accessible on your Mac.
Screen recording on a Mac:
• Any program that allows you to edit or view videos can be used to open screen recordings, such as QuickTime Player, iMovie, or any other program.
• Screen recordings are saved automatically by your Mac as Screen Recording at time.mov.
• By pressing command, shift, and 5 simultaneously on your keyboard, you can save your records.
• You can open the screenshot here. Using the pen. At the bottom of your screen is a control bar for Screenshots.
• Screenshots can be taken as either still images or videos. On the logo, there is a small circle recording icon, which indicates that video recording is available.
• You will be able to resize the recording window by dragging as you select "Record Selected Portion.
The recording window will automatically fill the entire screen if you choose to record the entire screen. Using the Screenshot Toolbar or QuickTime Player, you can record your Mac's screen. Screen recording on your new Mac is made possible by the Screenshot Toolbar. To capture exact portions of the screen, click Capture Entire Screen, Capture Selected Windows or Capture Selected Portion. Unless a timer is set, a screenshot will be taken immediately when Capture Entire Screen is selected. See how to take a screenshot for Mac. Even if you haven't updated your operating system in years or have an older Mac, you can still screen record with QuickTime.
#mac #macro #macro_spotlight #record #records #recordoftheday #recordtv #recordstores #recordatorio
Sharing = earning
1,000,000 views = € 1,000
100,000 views = € 100
10,000 views = € 10
1,000 views = € 1
500 views = € 0.50
250 views = € 0.25
100 views = € 0.10
50 views = € 0.05
25 views = € 0.025
10 views = € 0.01
And much more
- Comments (0)
- Recommended
- Milestones
No comments yet
Here are your recommended items...
Here are your milestones...

