

How to solve the rubbik cube?
Now you're going to learn how to solve the rubbik cube but before we dive in let's know a bit about its history.
In 1974, Ernő Rubik a Hungarian sculptor and professor of architecture invented The Rubik's Cube. It is a 3-D combination puzzle originally called the Magic cube. Like a cube with six faces, each face was covered by nine stickers, each of one of six solid colours: white, red, blue, orange, green, and yellow.
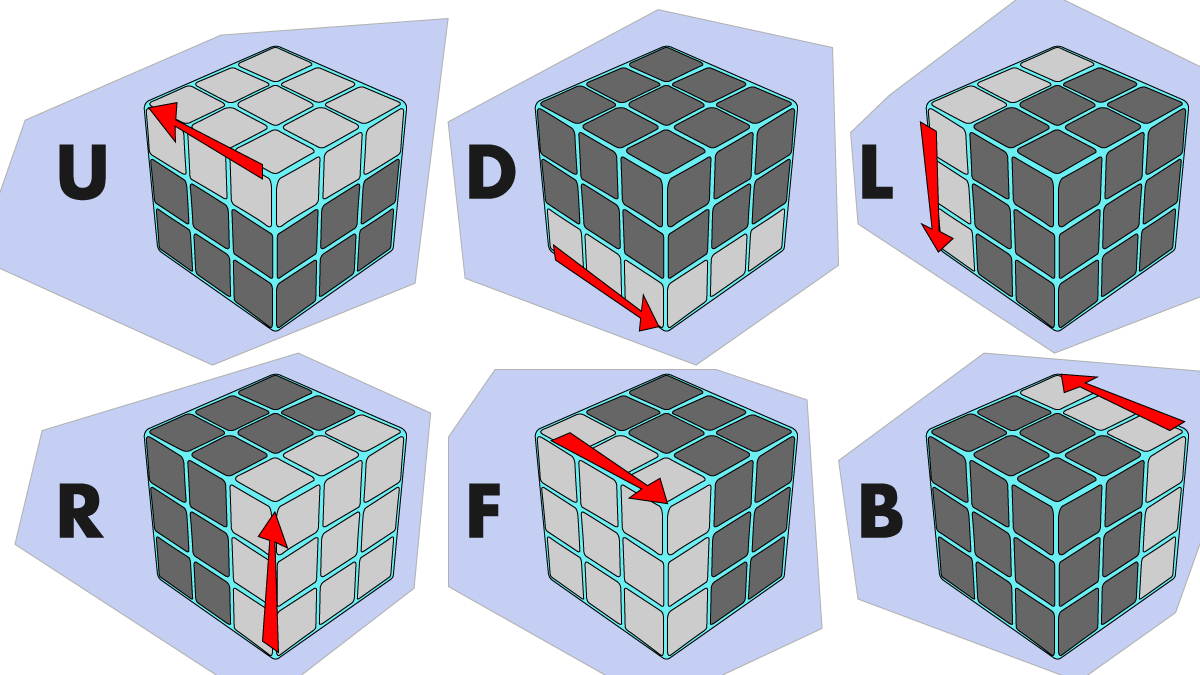
The vocabulary of Rubik Cube
To be good at solving Rubik cube you must be familiar with its vocabulary;
*Edge *Corner *Centre *Layer *Faces
How to solve Rubik Cube
1. Create white Cross
So if we begin with the white face, You have to make a white cross paying attention to the colour of the side centrepieces. try to do this without reading the instructions.
Get yourself familiar with the puzzle using this and see how far you can get without help. This step is relatively intuitive because there are no solved pieces to watch out for. Try moving the white edges to their places not messing up the ones already fixed.
2. Solve white Corners
At this point, let's arrange the white corner pieces to finish the first face. If you are very persistent and you managed to do the white cross without help then you can try to do this one as well. If you don't have patience I'll give you some clue.
Twist the bottom layer so that one of the white corners is directly under the spot where it's supposed to go on the top layer. Now, do one of the three algorithms depending on the orientation of the piece, aka. in which direction the white sticker is facing. If the white corner piece is where it belongs but turned wrong then first you have to pop it out.
3. Solve the second layer
Stage 1 and 2 were straight, but from here we'll need to use an algorithm. forget the completed white face and turn the cube upside down to focus on the unsolved side.
Here we will use two symmetric algorithms to resolve this step. They're called the Right and Left algorithms. These algorithms insert the Up-Front edge piece from the top layer to the middle layer while not messing up the solved white face.
4. Create a yellow cross
At this stage, Start solving the last layer making a yellow cross on the top of the cube. It doesn't matter if the pieces are not in their final places so we don't have to pay attention to the colours of the sides. We can get four possible patterns on the top.
5. Swap yellow edges in the top layer.
So After making the yellow cross on the top of the cube you have to put the yellow edge pieces in their final places to match the colours of the side centrepieces
6. Position yellow Corners
At this stage, Only the last layer corners are left unsolved. And we have to get them to the right spot. Don't worry about the orientation in this step. Look out for a piece that is already in the right place, move it to the right-front-top (marked with "OK") corner then apply the following algorithm to switch (cycle) the three wrong pieces marked with grey on the image.
7. Solve final yellow corners
All pieces are in their right places you just have to orient the yellow corners to finish the puzzle. Most times, this seems to be the most confusing. so reading the instructions and following the steps below could be very helpful.
Hold the cube in your hand with an unsolved corner on the front-right-top corner, then do the algorithm below twice or four times until that specific piece is oriented well: Turn the top layer only to move another unsolved yellow piece to the front-right-top corner of the cube and do the same R' D' R D again until this specific piece is ok. Be careful not to move the two bottom layers between the algorithms and never rotate the whole cube!. You are so close to the end so be careful because this is the step in this tutorial where most people get lost.
#rubbik #solve #how
Sharing = earning
1,000,000 views = € 1,000
100,000 views = € 100
10,000 views = € 10
1,000 views = € 1
500 views = € 0.50
250 views = € 0.25
100 views = € 0.10
50 views = € 0.05
25 views = € 0.025
10 views = € 0.01
And much more
- Comments (0)
- Recommended
- Milestones
No comments yet
Here are your recommended items...
Here are your milestones...

