What do you do with young toddlers (or toddlers) who are totally fan of Frozen? You do a fun scavenger hunt with that! The idea I got in from guest parentIneke van der Linde. What was made/ done?
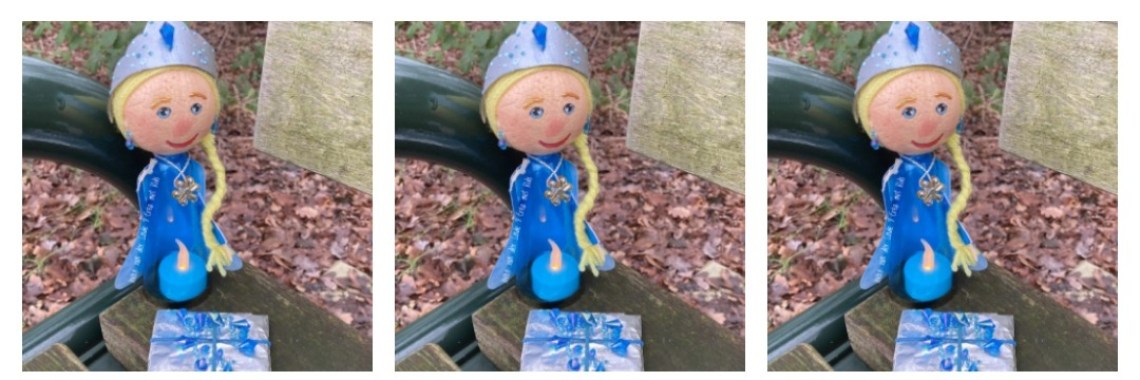
Ineke made icles from foil, where you will find below the photo with text step-by-step plan. There is also a little treasure packed with bling bling stones. And a special letter from Elsa.
The scavenger hunt follows the children on the basis of the icles that are hung from branches. The kids can follow them and then take them off. On the way there is a letter from Elsa with a beautiful Elsa doll. They may look for the treasure.
Ineke set off the scavenger hunt on the spot, and used distractions to hang the fungs unobtrusively. At your own discretion, you can expand the scavenger hunt with for example: movement games, guessing games, song etc. So you can also make the scavenger hunt more difficult!
The scavenger hunt is also ideal for a children's party! The pegels and Elsa are of course also fun craft activities!


Here's a little bit about the Elsa scavenger hunt.
Making a scavenger hunt doesn't have to be difficult and doesn't have to do much
Costs! And it can just be kept on familiar terrain! By using the
search and the assignments children notice that often do not even.
This time it's a scavenger hunt for the younger children. Elsa fans
from 3 years old. It is true that children of 4 years and maybe 5 years old
also like this, but they don't come because of COVID-19.
1. Grab a sheet of aluminum foil. In it make a sharp fold and tear
it in half. Repeat a few times for the length of the icle
that you have in mind. Note: No one Icicle is equal!
2. Fold the sheets of aluminium foil a number of times.
3. Grab a folded sheet of aluminium foil with both hands each on a
end fixed.
4. Turn with both hands against each other in the sheet so that a
kind of wokkel to.
5. Put it in a container of glue (I used a leftover wallpaper glue).
6. Then place it in another bowl and sprinkle blue glitter
over it.
7. Let it dry overnight.
8. Make a hole in it with a needle and put a silver string
through it as a hanging loop.
NOW YOUR TREASURE HUNT ELEMENTS ARE READY. MAKE AS MANY AS YOU WANT
HANG UP.
Craft Tip: This is also just fun to do as a craft activity.


MAKE ELSA
If you want to expand it a little, you can start with a letter that says
introduction serves the scavenger hunt and stating what the intention is.
Of course, you make this letter depending on the age
easy/difficult. I wrapped the letter in silver foil which fits
this theme. I also wrapped the “treasure” in silver foil. These are
rhinestones in silver and blue, which also fits this theme. Elsa
is found together with the letter in this case. The treasure lies at the
last icle clogged.
1. Take a disposable blue plastic champagne glass. Get the foot off of this.
2. Paint a styropor ball in skin tone. This is very easy when
you stick the ball on a satéstick. So you can also take the ball
Allow to dry.
3. Press the painted ball onto the champagne glass.
Cut 12 strips of 28cm yellow wool. Stick this with Creall Collall glue
on the ball (head). The middle of the threads on the middle of the
Stick your head. Tight behind each other. Let it dry for a while and put a braid
of it.
5. Turn the back of the head completely full of yellow wool thread.
6. Download the template. Cut out the molds. Lay the mold of the tiara
a toilet roll. Sign this over and cut it out. Don't cut the tiara yet
through the middle. Now you have firmness. If you dye cardboard it becomes a bit
slapper when it's wet. Cut the tiara in half only when it
completely decorated and dry. I have the tiara with Creall acrylic silver
Painted. Decorated with a rhinestone and pearl dots with the
PerlenPen Pastel Blue by Urban Craft Factory.
7. Take over the mold of the cape onto a piece of holographic blue cardboard.
The back is white. You can color these with Silky crayons blue and
silver. Thus, you will also get a “Frozen” effect. Cut this out and paste it
tight under the head.
8. Take over the mould of the arms on corrugated board or holographic
cardboard and take over the hands on skin color paper. Also paste this on the
right place.
9. Draw the mold of the wand onto the rest of the toilet roll.
Paint it also silver and decorate it too. I have these with Creall acrylic
paint silver and PerlenPen from Urban Craft Factory decorated.
10. The eyebrows are also done with a PerlenPen Gold. The Eyelets
are from a decopatchvel of Urban Craft Factory. The mouth is drawn with
special acrylic markers from Urban Craft Factory..
11. The necklace is a silver string that is also used as a hanging string
used for the icles. To this I have 2 rhinestones against
glued to each other.
12. The earrings are also rhinestones.


Nice Frozen stuff for the real fans!
Click on the photo of your choice and order it in the webshop!
Affiliate

