

Key Chain Making with Shrink

My niece's birthday soon. She wanted a key chain with her name. But of course you can make it yourself very easy with the help of Shrinkage plastic. This plastic can be machined with waterproof markers. In the oven, a drawing becomes 3 times smaller and thicker. A great idea to make your own keychain.
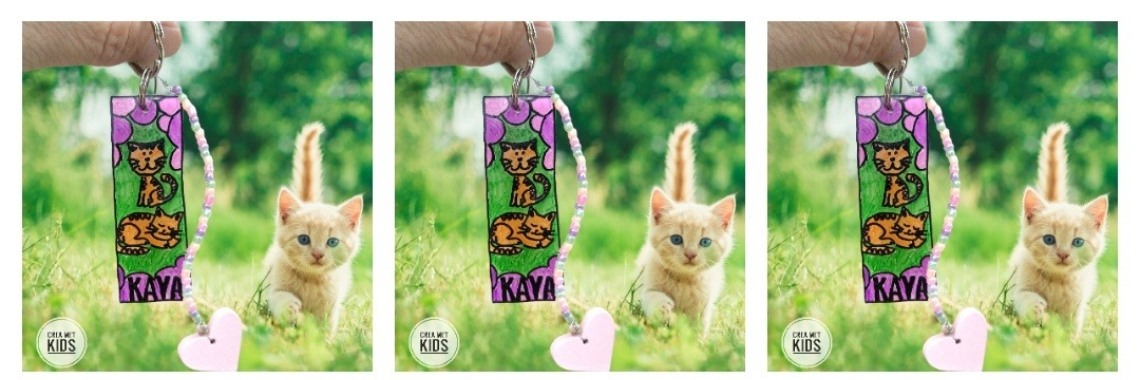
I used a bookmark as a starting point. . That size worked out well for the size of a keychain. My niece has 2 cats she really loves, so it became a key ring with that theme. I found that bookmark coloring page here. Of course, you can think of yourself what you're drawing on it. Provide dark outline and light colours, the key ring stands out well.
If you coloured the image, cut it out. Make a hole in the plastic with the punch. The oven will heat to 175 degrees. On top of this, place your key ring on a piece of baking paper (or like here silicone baking mat). It says 30 seconds it takes to shrink the plastic. It differs a bit per oven. I stick to it and see how far it is. You'll see it curling, but that's part of it. It takes a while for the weather to go to a flat version. If necessary, you can adjust with a wooden spoon.
If the plastic is flat again, take it out with an oven glove. Put it on a refractory surface and put something heavy on it. Once cooled, you can put a little ring through it. With this keychain I made an extra pendant with thin wire and colored beads. At the end a wooden heart bead and then fastened with an eyelet to the ring. After that, put the set on a bigger ring.


then €5.99/month after 14 days
Start your 14-day free trial now to publish your sponsored content. Cancel anytime.